
Automatic update of Windows 10 is a convenient way that a system remains updated whether it's Security Patches, updates for Microsoft Products or the device drivers.
Although drivers available through these updates work fine like a charm but sometimes getting device drivers updates can automatically cause issues on specific hardware configurations.
In this Windows 10 guide, I'll walk you through step by step to disable these automatic updates including these drivers updates as well.
Stop updates for drivers with Windows Update using Group Policy
if you are using Windows 10 Pro, the easiest and quickest way to stop these updates is through using the Local Group Policy Editor.Here are some steps:
1. Press Windows Key + R from the keyboard to open up Run command.
2. Type gpedit.msc and hit OK to open the Local Group Policy Editor.
3. Browse the following Path:
Computer Configuration > Administration Templates > Windows Components > Windows update
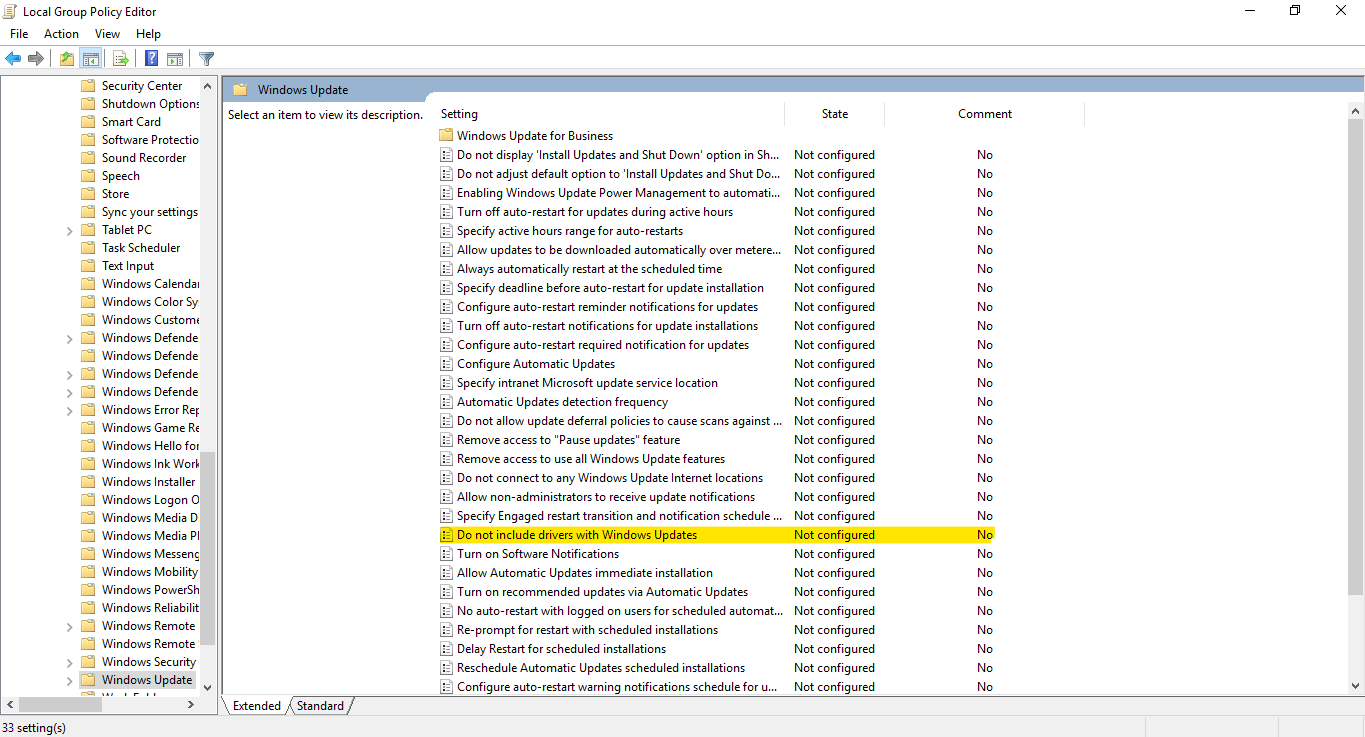
4. Open the right side, double-click the Don not include drivers with Windows Update policy.
5. Select the Enable option.

6. Click Apply and then OK.
After completing the steps, your device will continue to receive security and other patches, but drivers will be excluded.
Stop updates for drivers with Windows Update using Registry
If you are using Windows 10 Home then you won't have access to the Local Group Policy Editor, but you can still exclude driver updates by modifying the Registry with these steps:Warning: This is a reminder that editing the Registry can cause irreversible damage to your installation if you don't do it correctly.
1. Press Windows Key + R from the keyboard to open up Run command.
2. Type regedit, and click OK to open the Registry.
3. Browse the following path:
HKEY_LOCAL_MACHINE > SOFTWARE > Policies > Microsoft > Windows
4. Right click on the windows folder and make a New key.

5. Name the key WindowsUpdate and press Enter.
6. Right-click the newly created key, select New and click on DWORD (32-bit) Value.

7. Name the key ExcludeWUDriversInQualityUpdate and press Enter.
8. Double-click the newly created DWORD and set the value from 0 to 1.

9. Click OK.
Once you have completed these steps, other updates will continue to download, but you won't receive updates for drivers.
At any time you can revert the changes using the same instructions, but on step No. 4, inside the WindowsUpdate (folder) key, make sure to right-click the ExcludeWUDriversInQualityUpdate DWORD and select the Delete option.


 First Phone With 4 Camera")

